
No-code authentication with Cloudflare Zero Trust
Zero Trust is a convenient way to quickly add authentication to your site.
This post covers:
- Configuring your Zero Trust account.
- Adding a new “application” for the protected routes on your site.
- Adding a policy to restrict access by email address.
Caveats: Your domain name has to be hosted by Cloudflare, and you will need to provide a credit card. The service is priced per-seat, but if you expect less than 50 users, you can use it for free.
Zero Trust includes other services like warp and tunnel and gateway. I’ll talk more about those in future posts.
Configure your Zero Trust account
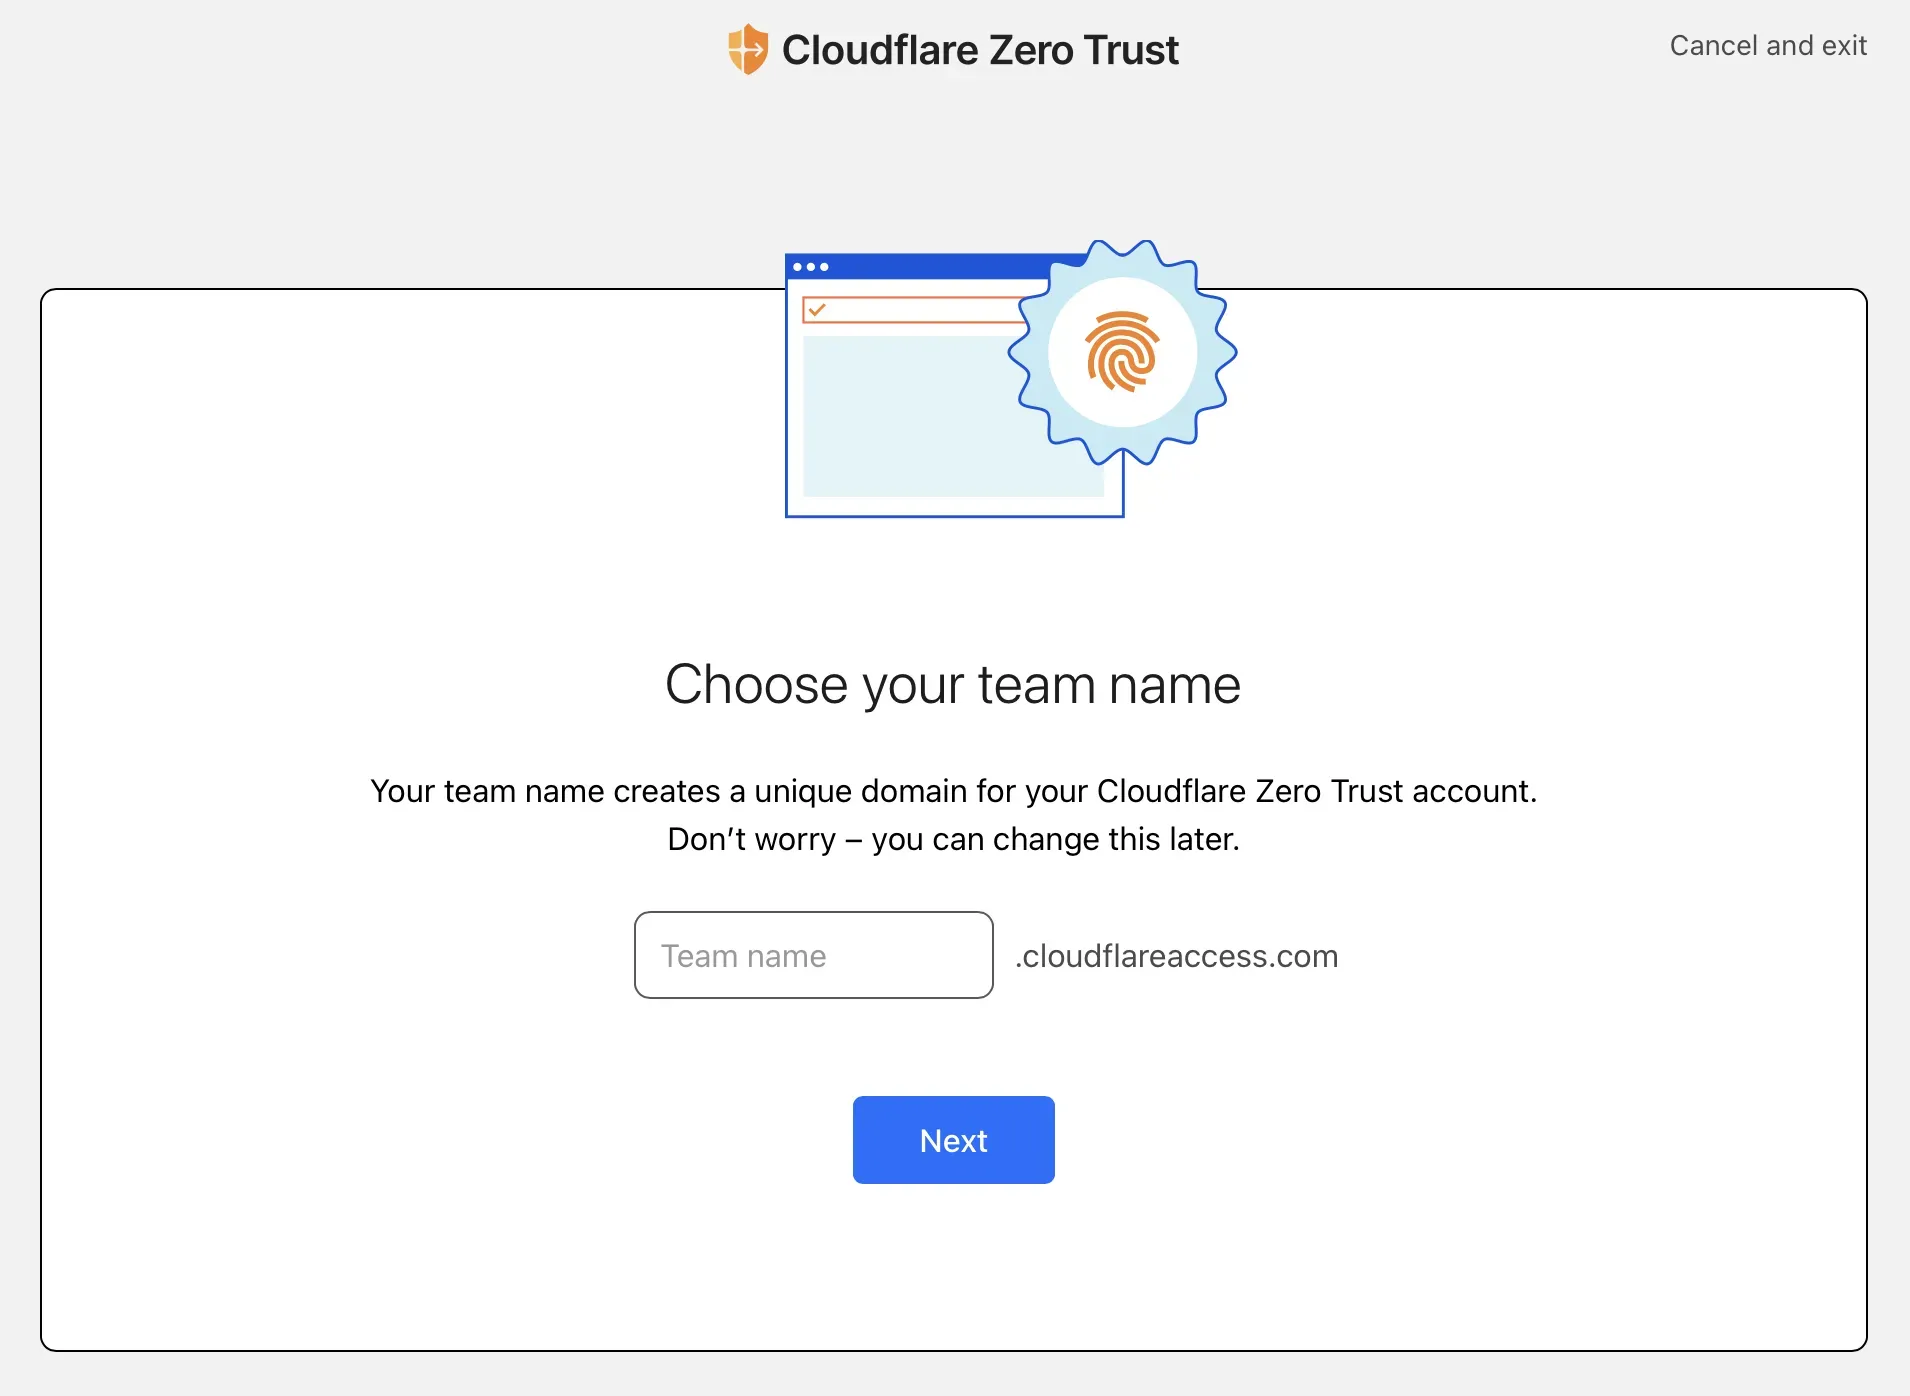
The first time you open the Zero Trust dashboard, you’ll be prompted for a “team” name for the login URL at <team-name>.cloudflareaccess.com.
Choose a team name and then sign up for the free plan.
Next, customize your login page under Settings > Custom Pages.
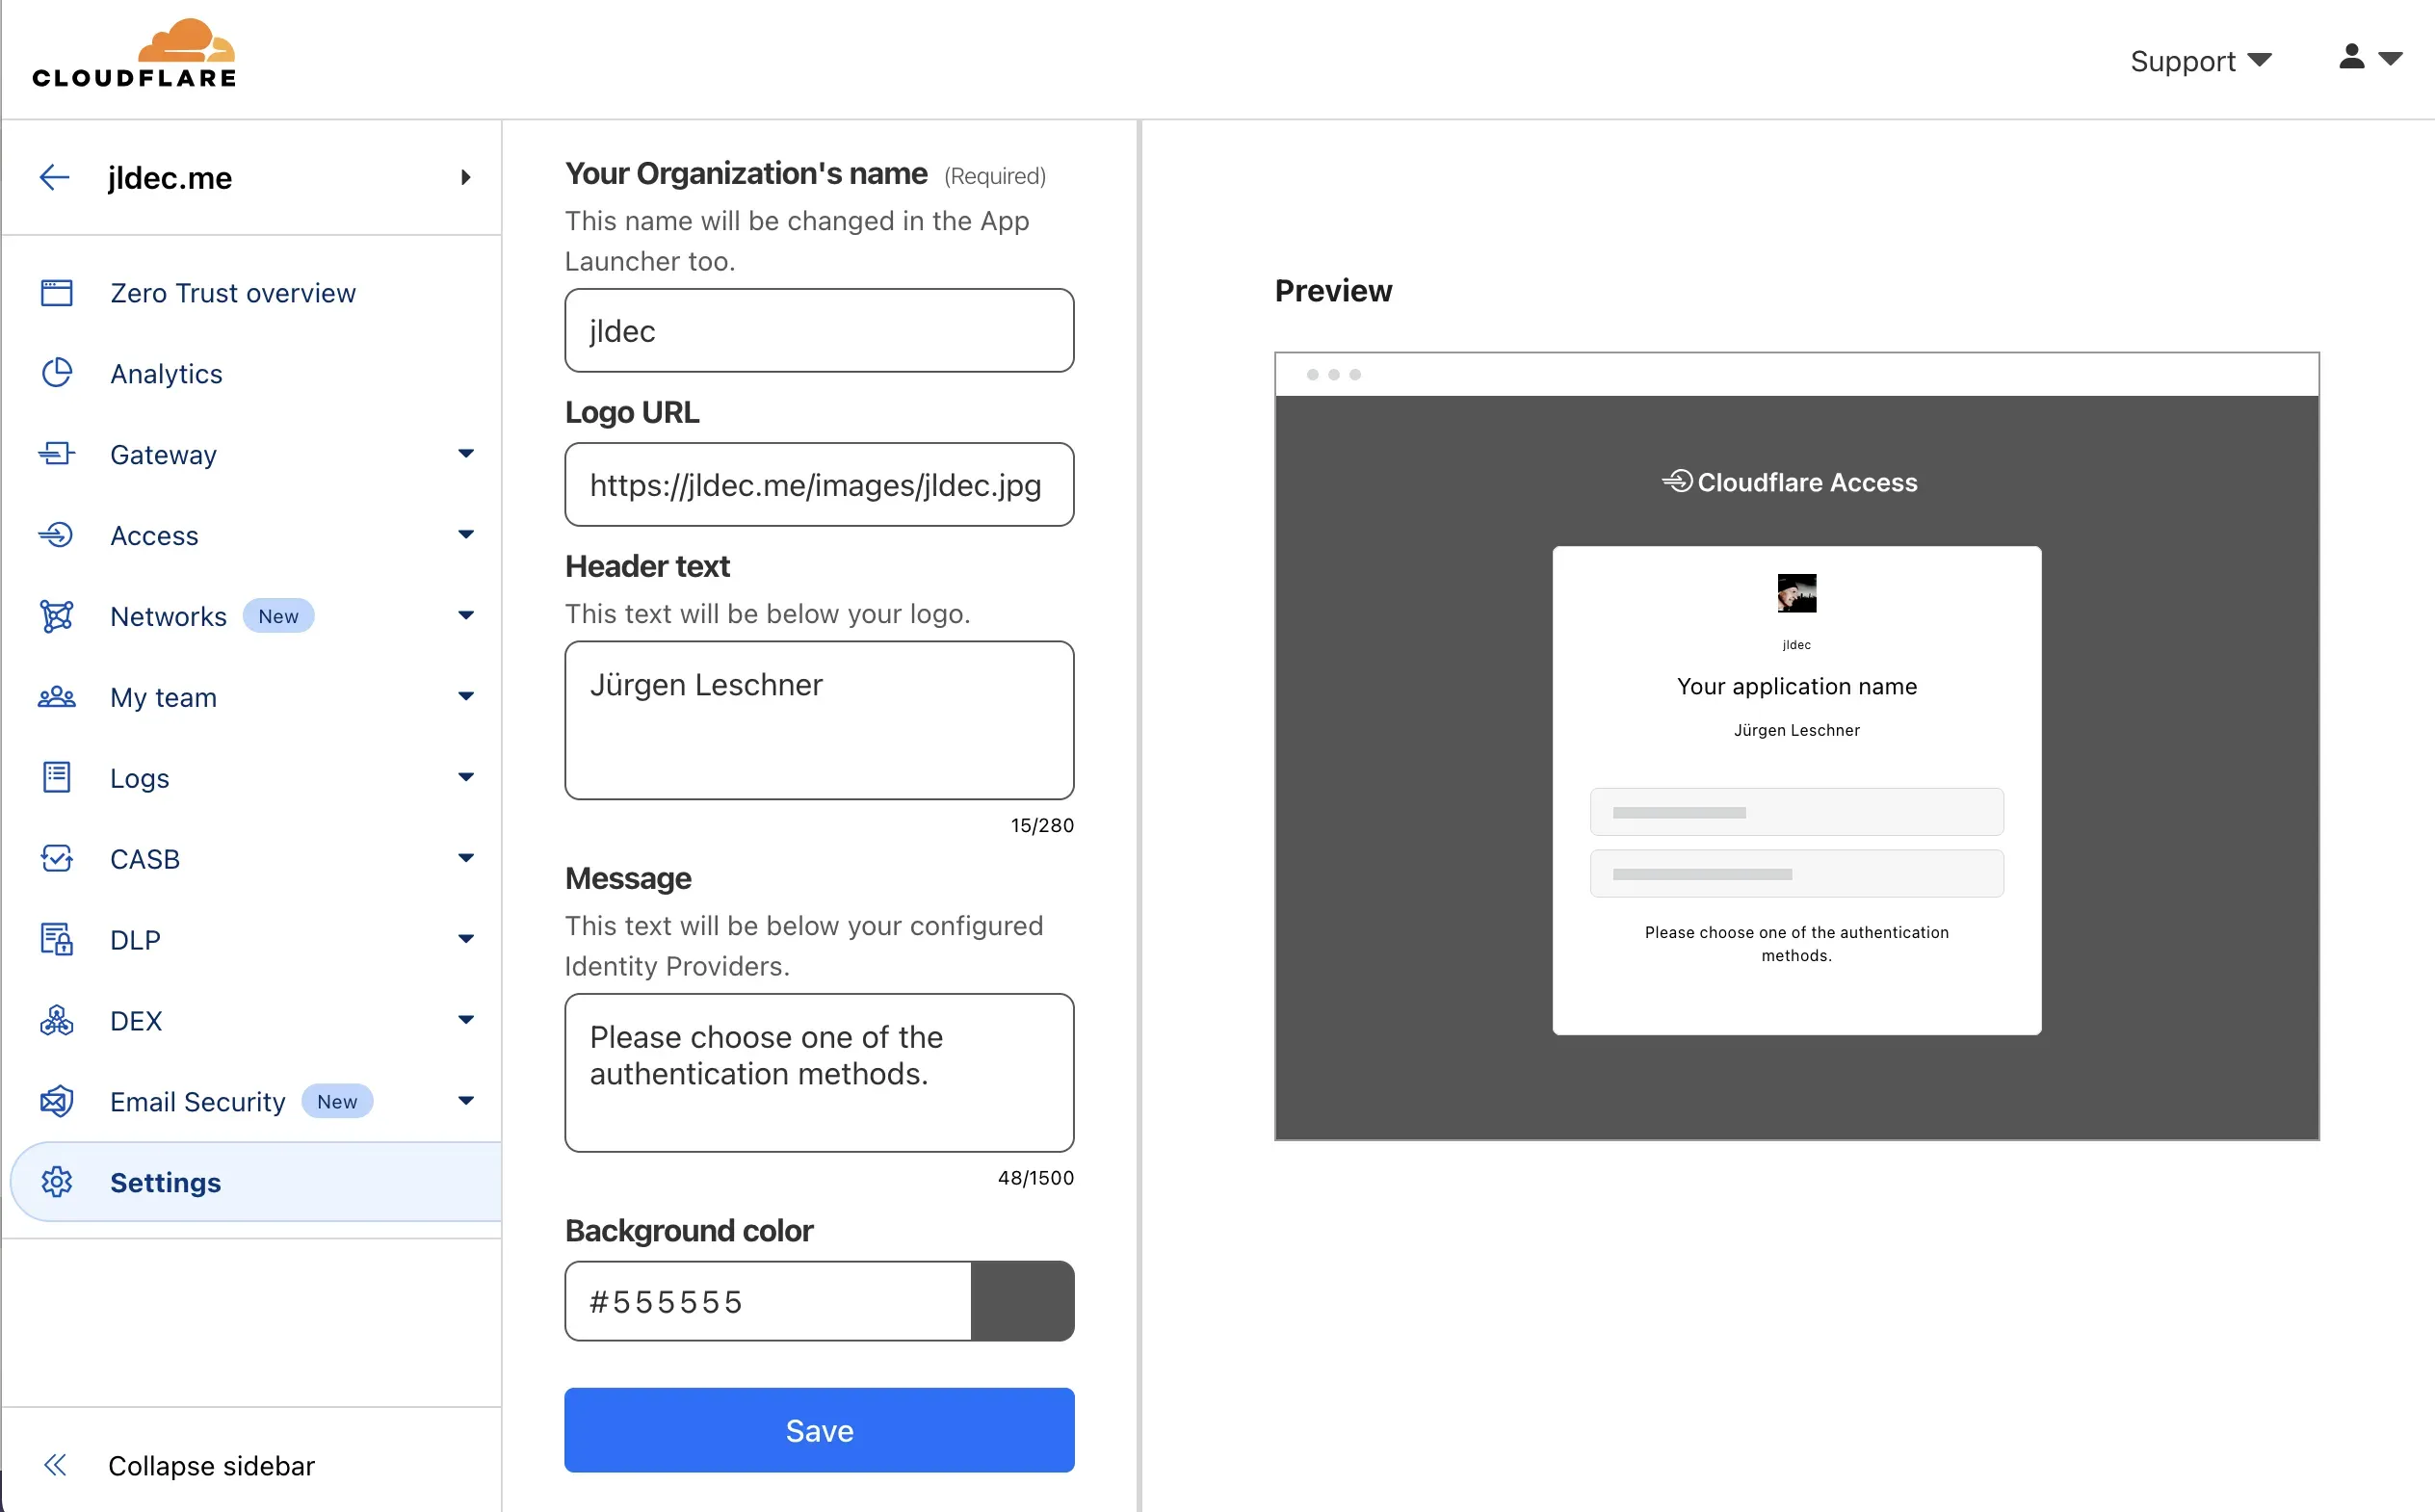
The login page will be shared across all sites protected by Zero Trust.
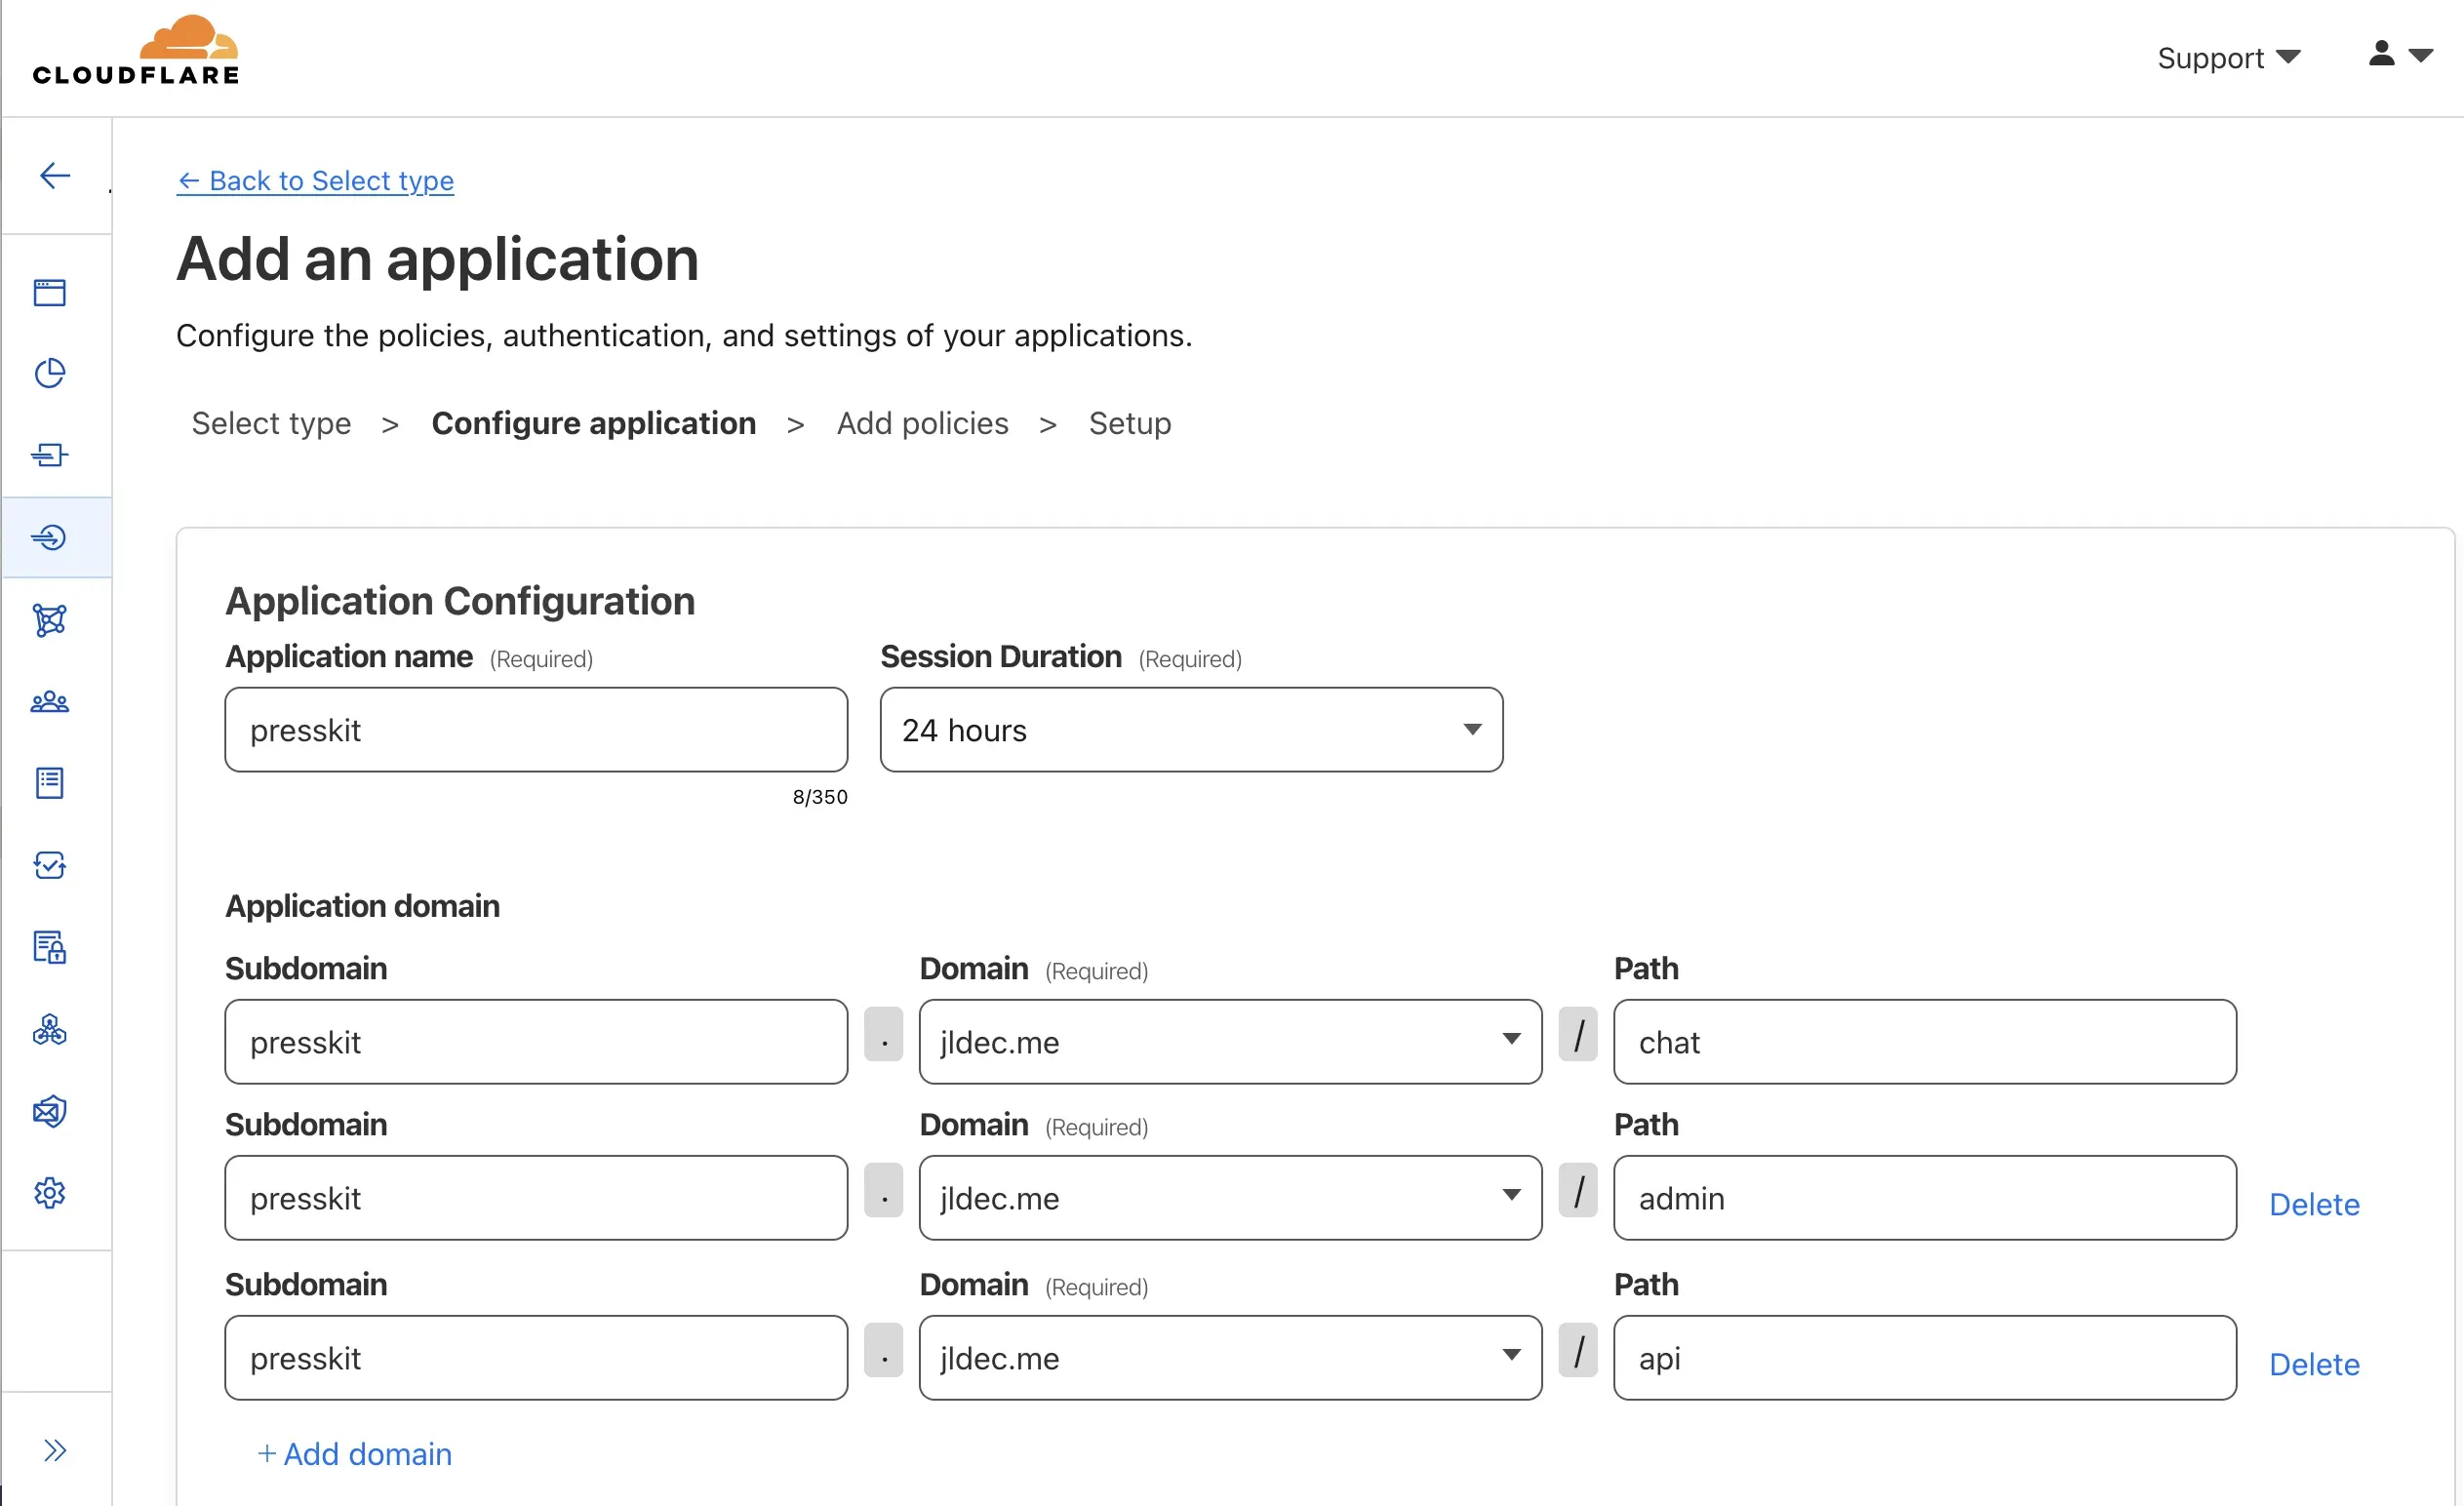
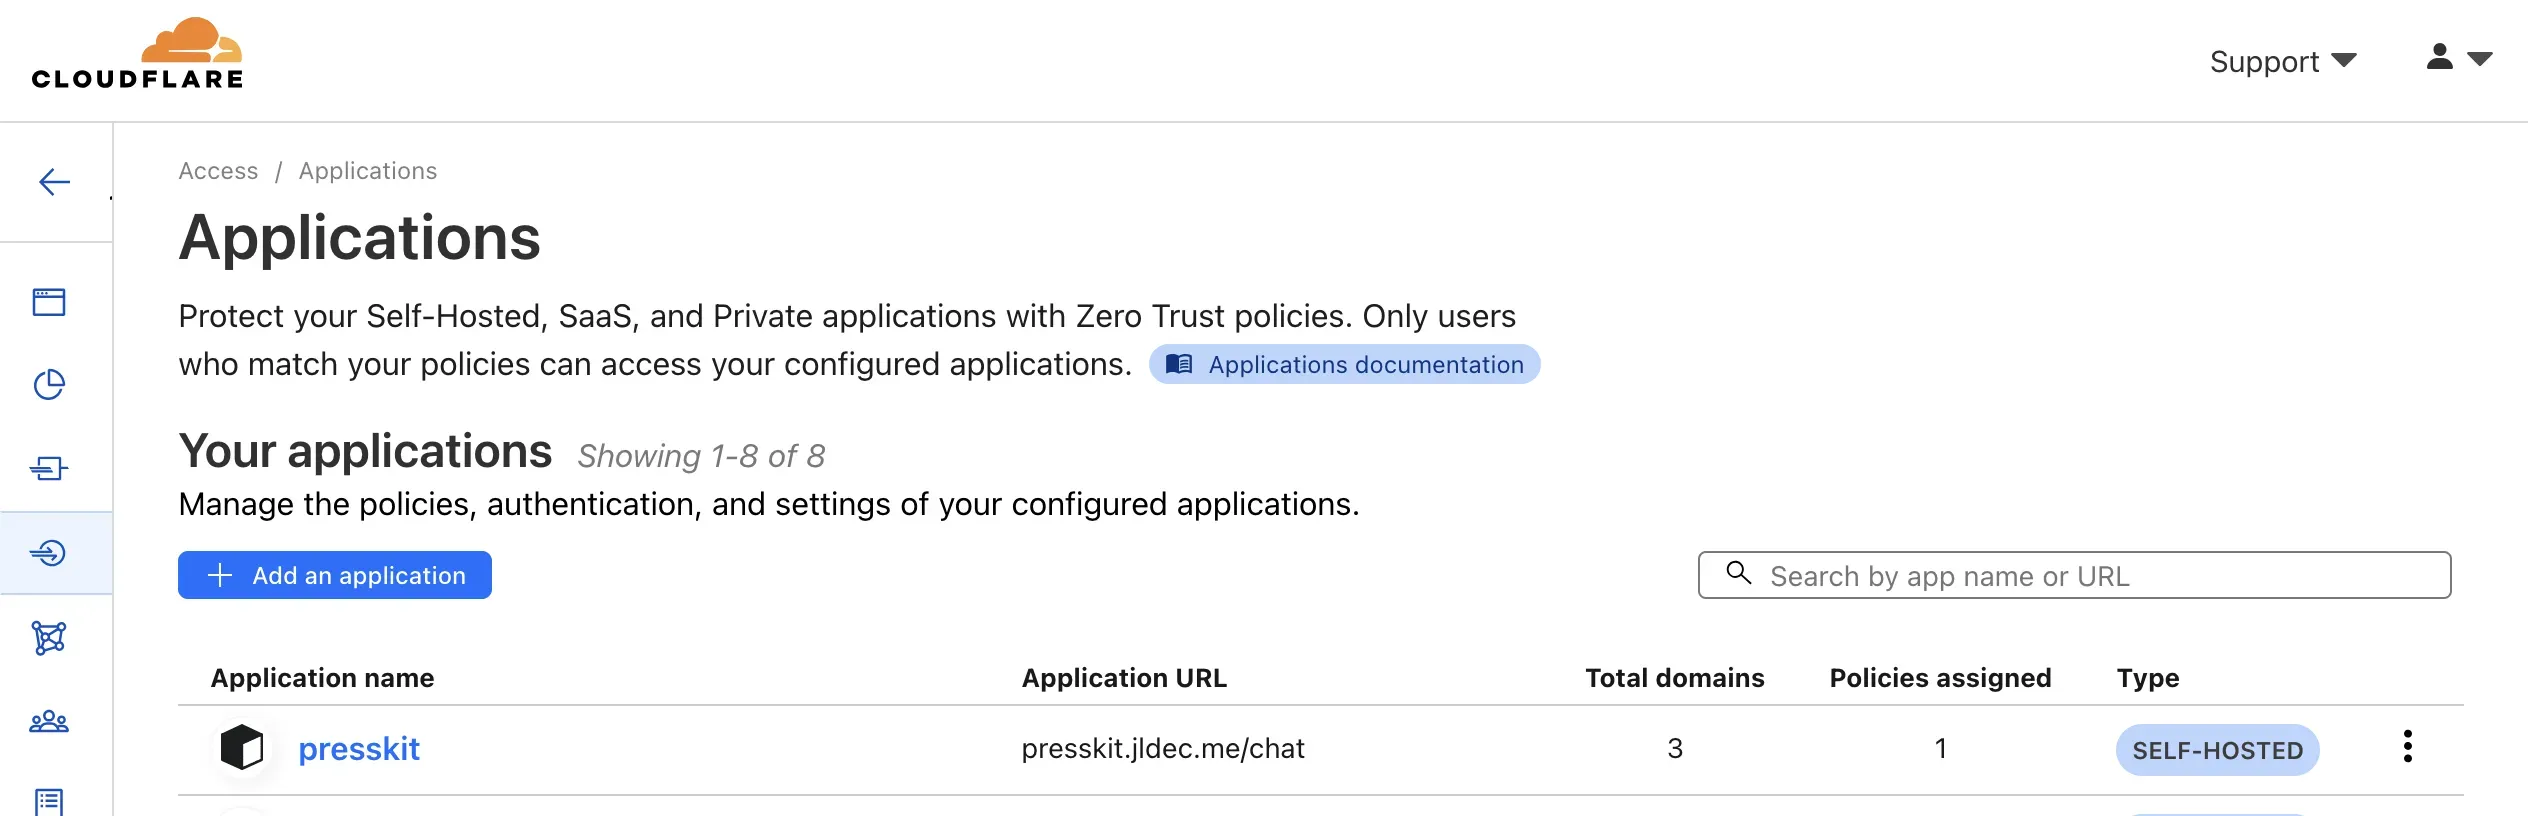
Add a new application
Under Access > Applications, click Add Application and select Self Hosted. Then configure the paths you want to protect.
Scrolling down to “Identity Providers” you should see One-time PIN is preconfigured. This is the simplest way to get started.
Add a policy
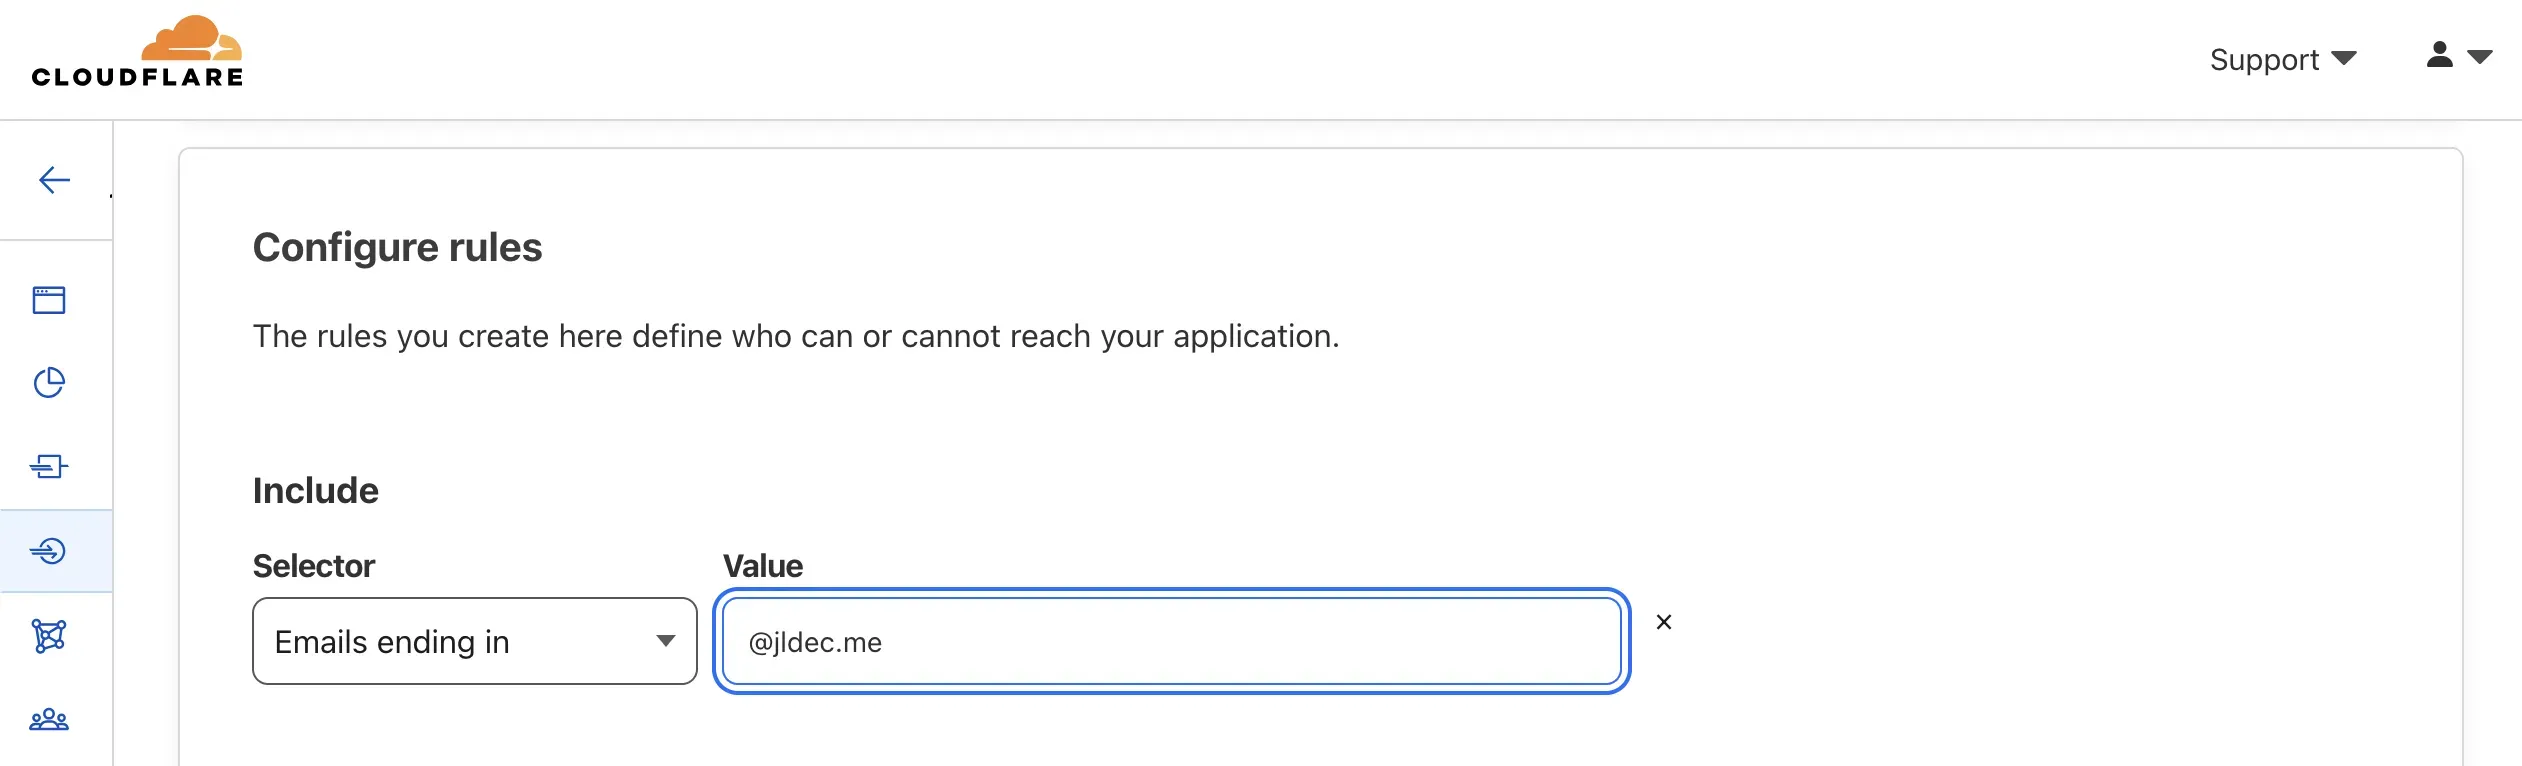
The Next button will open another page to add a new policy. This restricts who can access the site.

Enter a policy name and then scroll down to Configure Rules. I configured the rule Emails ending in.
Try it out
The remaining defaults are fine. After you click Add application you should see it in the applications list.
Point your browser to the URL you configured in the application. You should see the prompt to email a One-time PIN.

When you enter the PIN you should be authenticated, and allowed to access the site.
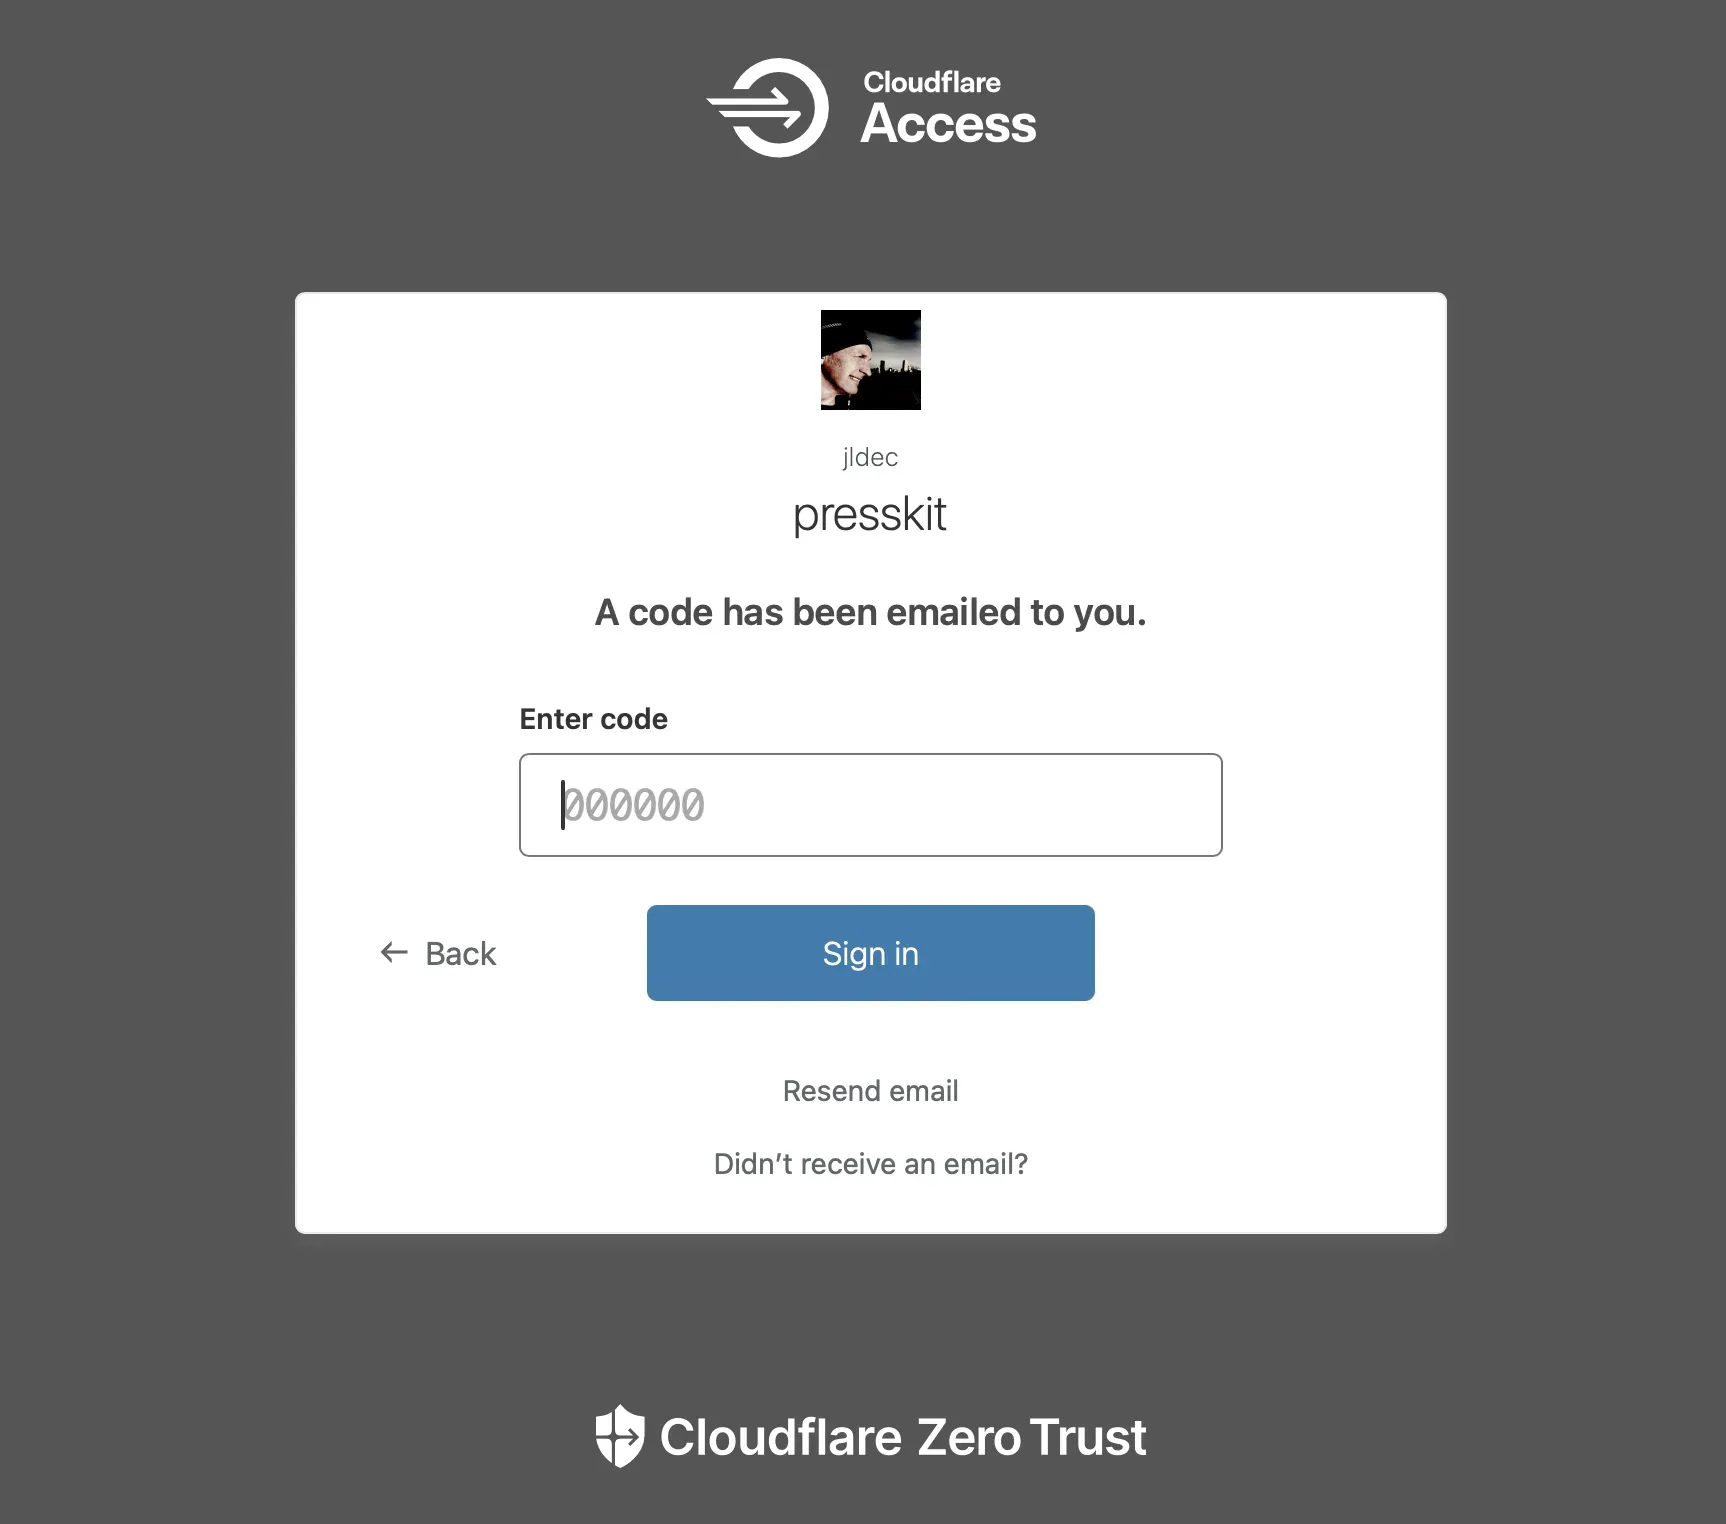
If your email address does not match the policy, you won’t receive any email and will not be able to access the site.
Next steps
If you prefer, you can replace the One-time PIN with another identity provider like GitHub or Google under Settings > Authentication.
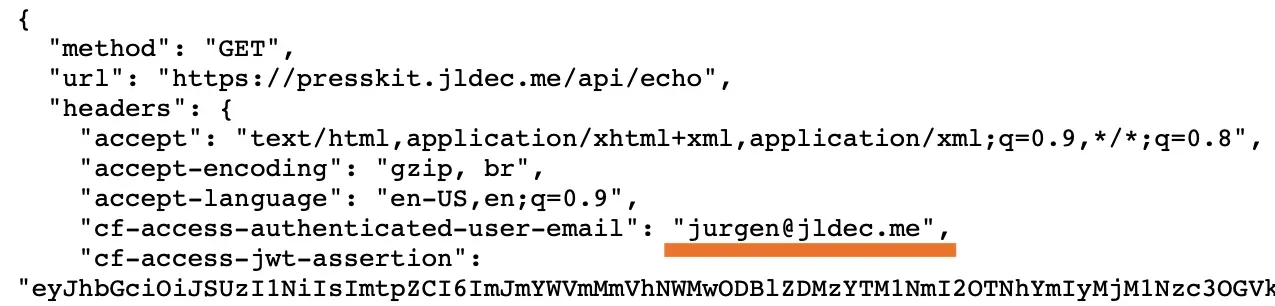
Once users have been authenticated, you can use this information in your site by inspecting the cf-access-authenticated-user-email header or validating the JWT token in the cf-access-jwt-assertion header.
💡💡
It took longer to write this post than to configure auth for jldec.me.